
Navigation; Using Map & Compass
As discussed in our last blog, this week’s subject is the first skill from the original 'Ten Essentials' list assembled in the 1930s by a The Mountaineers, a Seattle-based organization for climbers and outdoor adventurers, to help people be prepared for emergency situations in the outdoors.
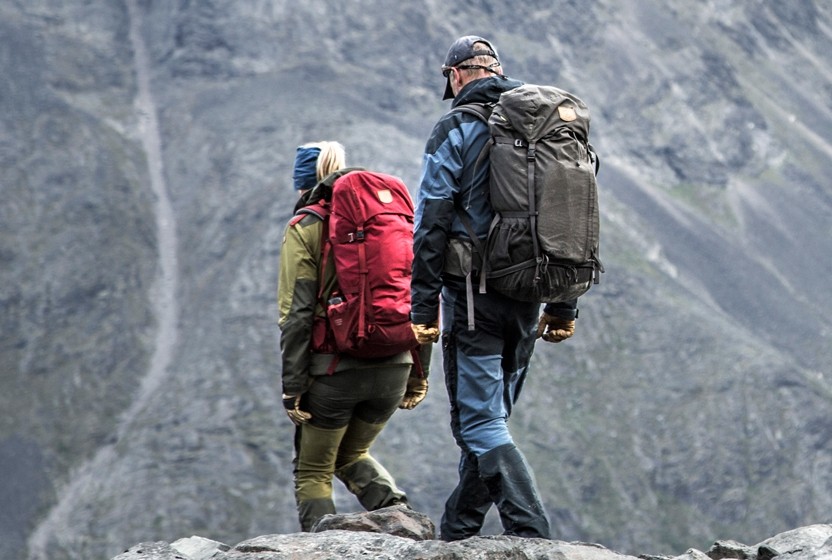
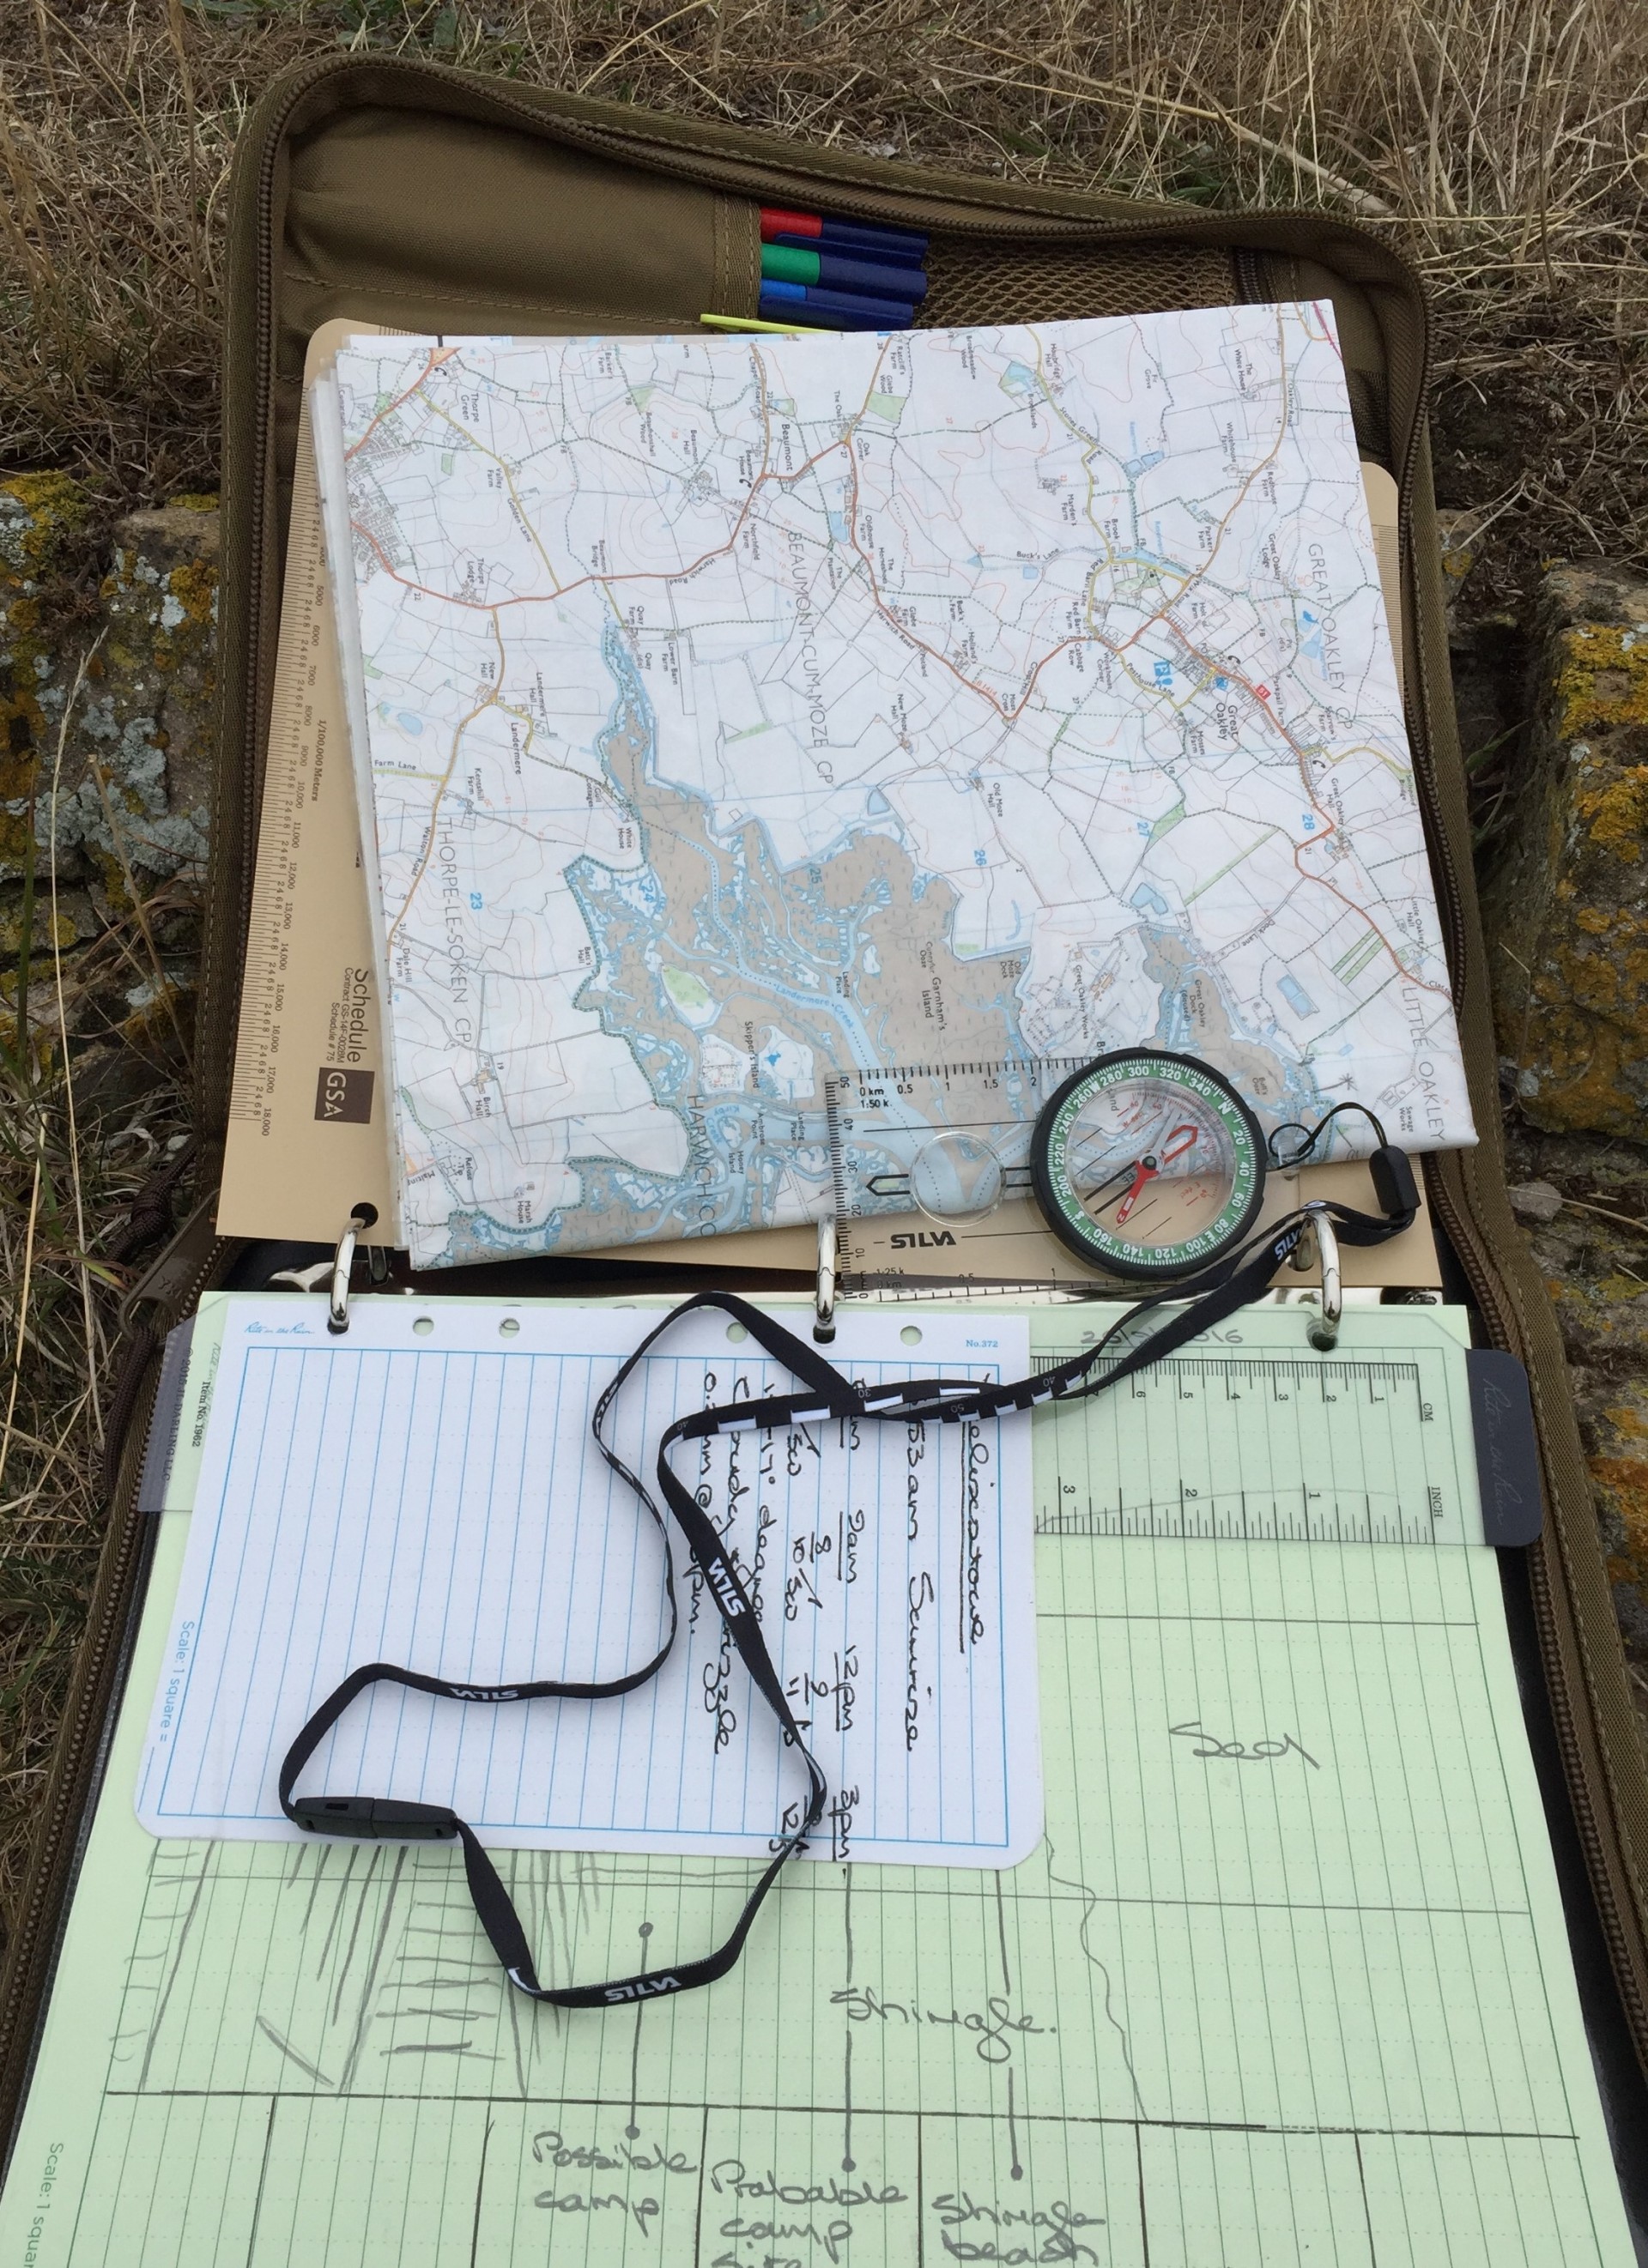
So today we’ll be covering the basic use of map and compass in the context of land-based navigation such as day hikes or multi-day extended trekking trips. For a selection of UK maps visit www.ordnancesurvey.co.uk in the most common scales of 1:25 000 and 1:50 000 dependant on how far you intend to travel. These maps are crammed with information and include a legend (key) for all of the map symbols as well as a scale in kilometres and statute miles. They even come laminated although these do get a little thick and cumbersome when you’re trying to fold it. Our advice is to purchase a standard map, fold it to cover just the area of travel for the particular day you are travelling, use two thick elastic bands, one at either end to hold the map flat and insert it into a clear, thick and sealable polythene plastic bag available at most supermarkets and online. Simple, functional and cheaper.
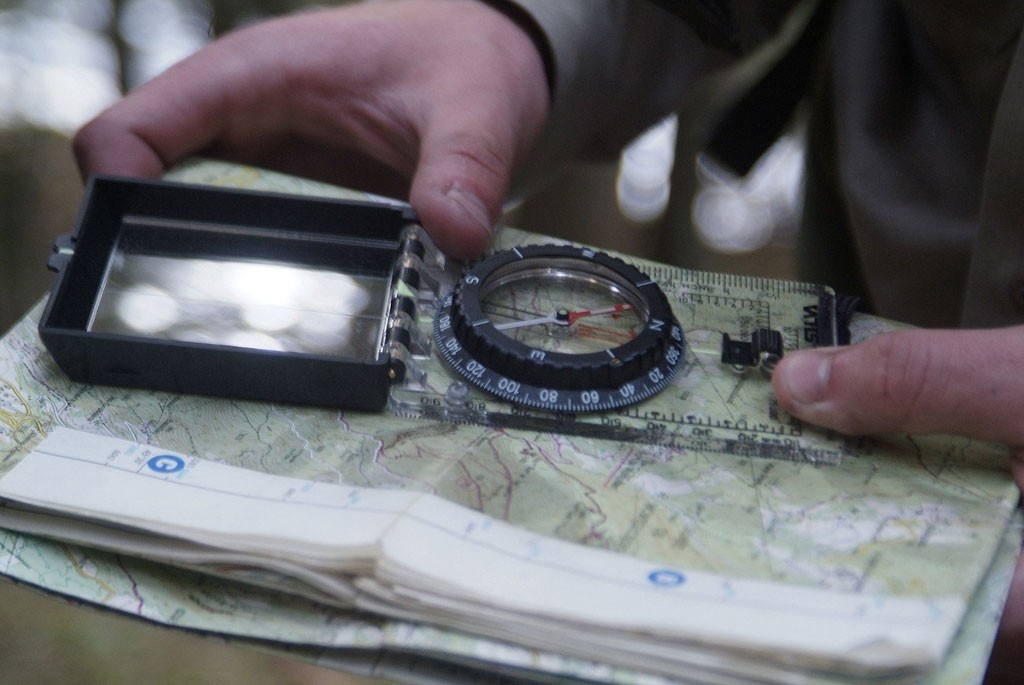
Compass features
Compasses come in many designs, but most compass features are the same as those found in an all-time classic compass like the Silva Ranger. You need to make use of some or all of the compass features for different tasks. Before you can use a compass to navigate you need to be familiar with the main features (please refer to the Blog image above).
1. Baseplate - this is what the compass is mounted on and has rulers and scales on it to help you measure distance. You will also notice a black line running the length. When taking your bearing on the map, this line can be used to line up where you are and were you want to go i.e., your direction of travel.
2. Compass housing – within the rotating bezel there is the magnetic needle (see number 3 for details). Around the bezel are marked 360° of a circle – these will give you your bearing.
3. Compass needle – it is floating in a liquid (usually alcohol) so it can freely rotate. The red end always points to magnetic north.
4. Orienting lines – they are fixed within the compass housing and can be aligned with the easting lines on your map to ensure you accurately align the compass with grid north.
5. Orienting arrow – this is fixed within the compass housing. When you come to take your bearing – you will align the compass needle with this arrow.
6. Index line – on some compasses, as shown here, it is a fixed black line within the bezel, on others it could be an arrow on the base plate. It is at this mark that you take your compass bearing.
7. The direction of travel arrow – this does what it says on the box – this is the direction in which you will be travelling in after taking your bearing.
8. Compass scales or Romer scales – these can help you measure distance and accurately help you work out your six-figure grid reference.
The main working part of a compass is the magnetic ‘needle’ that floats on a central pivot. The red end always points to the Earth’s magnetic north pole and the outer ring is marked with the cardinal points of the compass (N-S-E-W) and every 2 degrees. These markings are used to get bearings (the direction from where you are, to where you want to go).
If you rotate the ring to line-up the red north of the needle to the red arrow on the baseplate, a bearing can be taken from the compass ring.
Know your norths
Before we move on to how to use a compass we also need to understand the three different norths that there are. Have a look at the legend on your Ordnance Survey map and you will see that there is a section called North Points. When it comes to compass navigation – this is an important section of the legend.
There are three norths. The first is true north – this is where the North Pole is and for the purposes of navigation can be ignored. The next one is grid north – this is the top of your map. It’s the same for all Ordnance Survey maps which means that rather than being one single point – it is a line as if the world is flat and all along the top is north. The third and final north is magnetic north. This is where the compass needle points to and is governed by the magnetic field of the earth. We’ll be talking about this in more detail next week.
How to take a compass bearing
To start with you need to know where you are on the map (point A) and where you want to go to (point B – attack point).
Line up point A and B with either the side of your compass or one of the black lines running down the base plate, making sure that the direction of travel arrow is the point in the direction you want to go in (so towards point B – attack point).
Now you want to turn the compass housing bezel so that the “N” on the bezel and the orienteering arrow is pointed to grid north (the top of the map). To help do this – make sure that the orienteering lines are lined up with the easting lines on the map.
Now you can lift the compass off the map. Look at the index line – this has given you your bearing from the map. We now need to add the 2° to this to make grid north match magnetic north. Stand up with the direction of travel arrow pointing directly in front of you. Walk around in a circle until you have the compass needle lined up with the orienting arrow.
Look up, following the direction of travel arrow and pick a natural feature or landmark that is directly in line with where you are looking/where the direction of travel arrow points towards.
Walk towards this landmark and once there check your bearing, pick another landmark to walk towards. Repeat this until you reach your destination (point B - Objective).
If you’re unsure about using a compass the best thing to do is get the map of an area you know really well, perhaps somewhere local to where you live, and is somewhere that you wouldn’t usually need a map to get around. Take yourself off for a walk, using the map and a compass to navigate your way. This way you shouldn’t get yourself lost (as it’s an area you know really well) and you can check that the direction you think you should be travelling in matches what the compass is telling you! Failing that, join one of our weekend hikes and we’ll teach you these skills and more.
Top tips for beginners
Ensure that the direction of travel arrow is pointing in the direction you want to walk in – it’s called the direction of travel arrow for a reason!
Always make sure that the orienting arrow is pointing to grid north (the top of the map) rather than grid south (the bottom of the map) – even if you are walking south – the orienting arrow still needs to point north. Unless you always want to walk due north – follow the direction of travel arrow rather than the compass needle.
Make sure that the landmark you pick is a feature on the landscape that is not liable to move – pick a tree, gate post, gorse bush or boulder for example rather than a cow, sheep, person or bird. And finally, walk to your attack point and then take the bearing to your next attack point, constantly navigating in short legs and always ensuring you know exactly where you are on the map. Our thanks to Ordnance Survey for their contribution; www.ordnancesurvey.co.uk
Our next blog article will cover the subject of clothing and more to the point, how to layer your clothing for warmth, venting and comfort.

Since surfing with the pros as a kid in Durban South Africa on my hollow 12ft barge & getting absolutely trashed, I was hooked on sea paddling. Over a period of forty-two years I’ve surfed, white watered & sea kayaked in locations around the world. I've guided as a full-time professional for the past twenty one years & my journey continues.